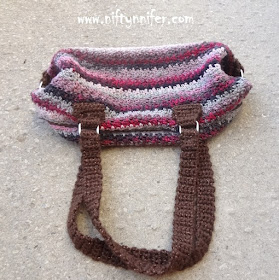
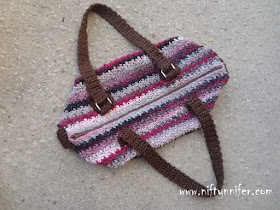
Add this pattern to your Ravelry favourites here.
Materials Required:
~Sewing pins.
~Needle.
~Thread to match yarn.
~5 MM Crochet Hook.
~Darning Needle.
~Zipper. Approximately 15 inches.
~Approximately 1 inch Metal Rings X4.
~Round Markers.
~Yarn: Bernat Mosaic (Medium 4), in colour 'Pink Poodle'; 100g ball X2.
~Yarn: Bernat Satin Sparkle (Medium 4), in colour 'Bronze'; 80g ball X2.
Gauge:
Approximately 12 sc = 3 inches.
Approximately 7 rows = 3 inches.
Special Abbreviations:
Ch = Chain.
Sc = Single Crochet.
Dc = Double Crochet.
Ea = Each.
St(s) = Stitch(es).
Mnr = Mark New Row/Round.
Rnd(s) = Round(s).
** = Repeat instructions as many times as indicated within **.
Beg = Beginning.
Ss = Slip Stitch.
Hdc = Half Double Crochet.
Sk = Skip.
Instructions:
Starting with 5 mm crochet hook and Pink Poodle yarn. Working from bottom of purse to top.
Bottom:
Ch 13.
Row 1: Sc in 2nd ch from hook.(12sc)
Rows 2-48: Ch 1. Turn. Sc in ea st across.(12sc)
Piece should measure approximately 3 inches wide X 11 inches long. This is also a great time to check your gauge.

Border:
Rnd 1: Ch 1. Do not turn. Sc in same st.(mnr). *Now working along side, sc in side of ea row until your reach next corner. Place 2 sc in corner. Sc in ea st across to next corner.* 2 sc in corner st. Repeat from * to *. Sc in same corner st as beg sc. (122 sc). Ss in beg sc to join.(mnr).
Rnd 2: Do not turn. Ss in ea st around. Ss to join.(mnr).(122ss).
Rnd 3: Ch 1. Turn. Sc in top of last ss made (mnr) and ea ss around. Ss in beg sc to join. (122sc)
This is what it will look like around the edges.

Rnd 4: (Right side).Ch 2.(mnr). Turn. Hdc in ea st around. Ss in top of beg ch 2 to join.(122hdc).(mnr).
Rnd 5: Do not turn. Sc in same st as last ss made.(mnr). *Dc in next st, sc in next st.* Repeat from * to * around. (122sts)
Rnd 6: Ss to join in beg sc. Ch 2.(mnr). Turn. *Sc in top of next dc, dc in top of next sc.* Repeat from * to * around. (122sts)
Rnd 7: Ss to join in beg ch 2. Ch 1. Turn. Sc in same st. *Dc in next sc, sc in next dc.* Repeat from * to * around. (122sts)
Rnds 8-25: Repeat rnds 6 and 7 alternating.
Rnd 26: Ss to join. Ch 1. Do not turn. Sc in next st.(mnr). Sc in next 48 sts. Sk next 12 sts. Sc in next 48 sts. Sk next 12 sts. Ss in beg sc to join. (97sc). Fasten off and weave in ends.
Lay purse out flat.
Project should measure approximately 9 1/2 inches from bottom to top.
Project should also measure approximately 19 inches wide.

Butterfly Pieces:
Using a 5 mm crochet hook and 2 strands of Bronze Satin Sparkle yarn at once.
Ch 8.
Row 1: Sc in 2nd ch from hook and ea ch across. (7sc)
Rows 2 & 3: Ch 1. Turn. Sc in in next 7 sts. (7sc)
Row 4: Turn. Sk next st. Sc in next 5 sts. (5sc)
Rows 5 - 8: Ch 1. Turn. Sc in next 5 sts. (5sc)
Row 9: Ch 1. Turn. 2 sc in next st. Sc in next 3 sts. 2 sc in next st.(7sc)
Rows 10 & 11: Ch 1. Turn. Sc in next 7 sts.(7sc).
Fasten off, leaving a tail for sewing.
Photo showing approximate size of your butterfly pieces.
Make 6 Butterfly pieces!
This photo shows how your butterfly pieces will appear on each metal ring. It's okay if your rings are not identical to mine. I cut mine off an old, broken purse.
The 2 pieces on the left will be for Strap A. The 2 pieces on the right will act as your Side Pieces.
Straps:
Part 1:
Ch 5.
Row 1: Sc in 2nd ch from hook and ea ch across.(4sc)
Rows 2-80: Ch 1. Turn. Sc in next 4 sts. (4sc)
Fasten off at end, leaving a tail for sewing.
Make 2 straps.
Attaching Side Pieces:
Start at bottom of one side of your purse. Place a metal ring onto one butterfly piece.
Fold and line up sides of butterfly piece, then line up with bottom, side of purse (as seen in photo).
Using stitch markers, pin the piece to your project to hold in place. The ring end will point toward the top of the purse.
Using a darning needle and the yarn tails.
Be very careful not sew your purse closed.
Sew you butterfly piece in place, closing the butterfly and securing it in place. Sew the butterfly sides together and to side of purse at least 2 or 3 rows up. Your metal ring should be secure.
Repeat on other side.
Now working on one top end side of purse. Remember those 12 stitches on each side that you skipped in the last row of the purse? The sides of the zipper opening.
Pin corner to corner, then fold end to end together and pin in place.
Slide a second butterfly piece onto the ring.

Fold the second butterfly piece over the top end corner you just formed. Pin in place. Using a darning needle and the yarn tails sew the butterfly in place, encasing the corner inside the butterfly. Remove the pins/markers before closing the butterfly completely.
Sew in your ends while fastening butterflies to sides of purse. Being very careful not to sew your purse closed.
Repeat on the other side.
This picture shows how your side pieces should look when finished.
Straps:
Part 2:
Working on Strap A.
Using one strap, attach a ring at each end, approximately 4 rows in, folding strap end over.
Sew together using yarn tails and a darning needle.
Sew in your ends.
Use last 2 Butterfly pieces by threading them onto rings on ends of Strap A. Your 2nd strap will not have rings.
Pin Strap A to purse at approximately 10 sts from side(counting along zipper opening) and lining Butterfly piece bottom approximately 9 rows down on each side.
Be careful not to twist your strap. Sew to side of purse using darning needle and yarn tails. Be careful again not to sew your purse closed or the sides together.
Attach Strap B to the other side of the purse, lining it up with the other strap as best you can. Sew it in place, at least 4 rows up each end of your strap, to side of purse.
Zipper Attachment
After trying many ways to attach my zipper I ended up finding the perfect tutorial called 'Tutorial: Conquering The Zipper!' by Pattern Paradise.

I wrote a Review ~The Perfect Zipper! and just how awesome my zipper turned out.
See more free patterns here.


